Wednesday, December 10, 2014

NEO Trailer

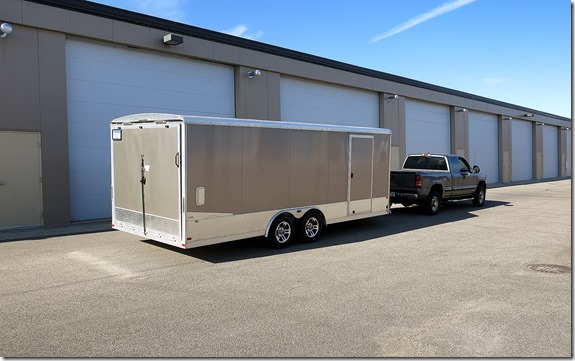
I took delivery of a new enclosed car trailer from Becker Custom Trailers early last year. The auction of my dad’s collection of antique automobiles required moving many vehicles and helped to inform us about what to look for in a new trailer. The Becker trailer I purchased was built by NEO Manufacturing in Michigan and sold by a Becker dealership in Wisconsin.

The trailer is a 20’ plus 5’ Aluminum Wedge Deluxe. It is 25’ long, 8.5’ wide, rated for 7,000 lbs. and fitted with a 5,000 lb. winch and interior lights. It is a welcome addition to our fleet of car moving equipment.

img_8560(2)

Tuesday, November 11, 2014

Mid-rise Scissors Lift in Action

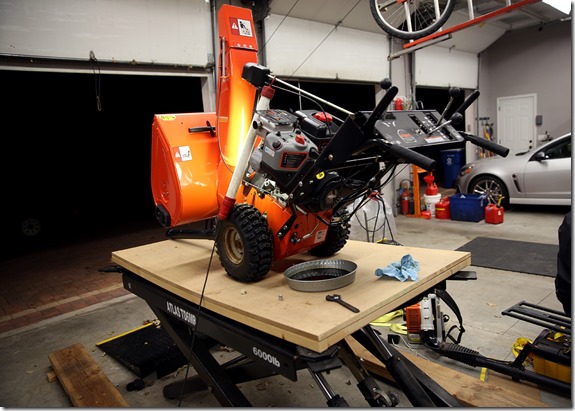
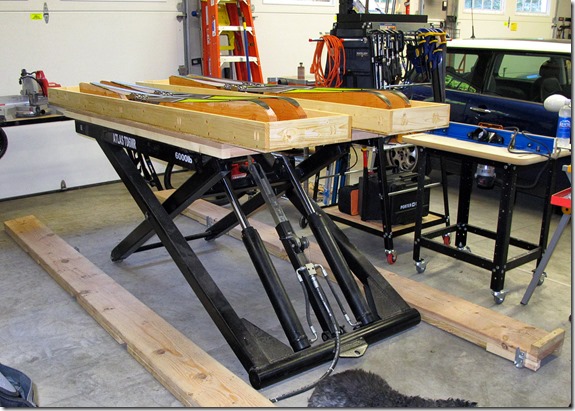
The Atlas Scissors Lift comes in very handy for servicing lawnmowers and snow blowers. I built a 4’ x 8’ platform that sits on the lift and becomes an adjustable height work surface. This allows a snow blower oil change to take place at waist level.

4G3A0491(2)

Wednesday, July 2, 2014

1936 Cord Engine… It’s Alive!

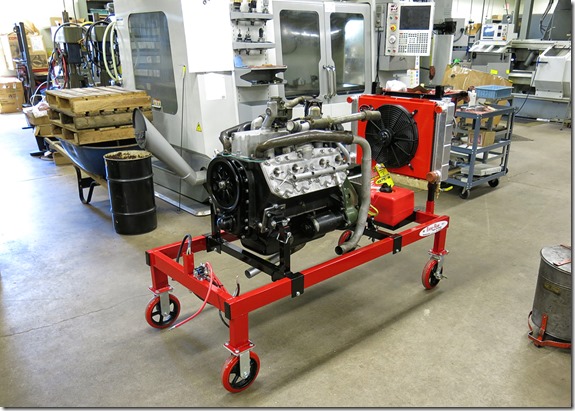
Eric started the Cord engine on our running stand early this afternoon. He’s spent the last few weeks replacing gaskets, assembling parts and readying the stand for this first running. The engine started right up and sounds great.

Wednesday, June 11, 2014

1936 Cord Engine (update)

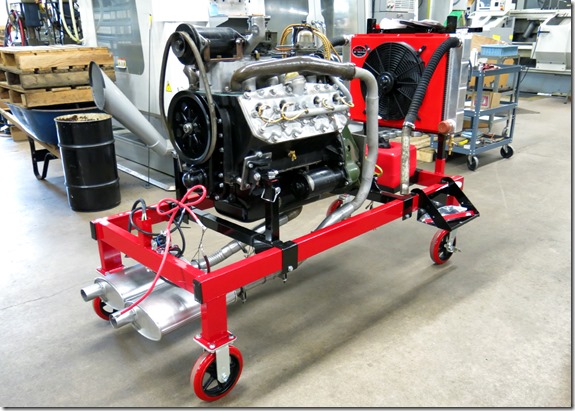
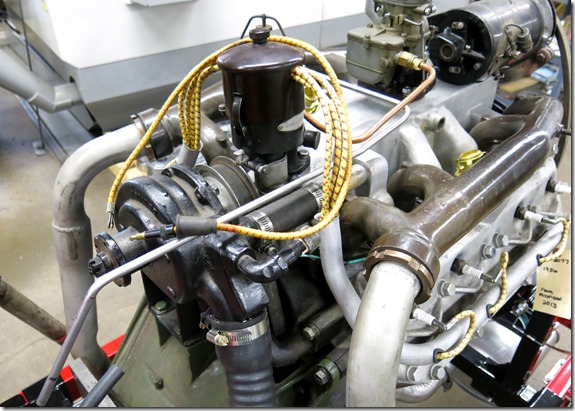
A couple more weeks of work on the 1936 Cord engine finds us nearly ready to fire it up for the first time. The photos below show many of the multitude of little details we’ve attended to as the engine is readied to run. Eric has completely rebuilt the water pump, constructed a set of vintage plug wires, fitted the engine and stand with mufflers, and is nearly ready to connect the engine to the radiator. It is going to be really fun to fire this up for the first time!

IMG_6930(3)

IMG_6942(3)

Saturday, June 7, 2014

Lotus Exige Mirrors…

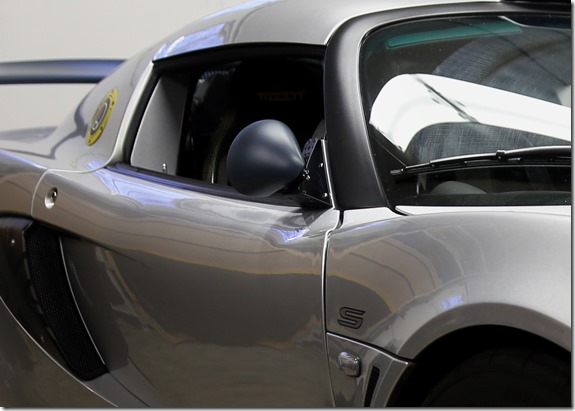
The Lotus arrived with a pair of mirrors designed and built by Mark Brandt of Luftkraft Fabricating in Colorado. Mark did an excellent job of fabricating the mirrors and they look great on the Exige.

But… The actual glass surface on the Luftkraft mirrors is about 1/2 the size of the original equipment set. The visibility out the rear of an Exige is already extremely limited because the intercooler completely any view from inside the car. The small sized Luftkraft mirrors make it very difficult to see what is going on behind the car as you zoom down the road.

4G3A3610(3)

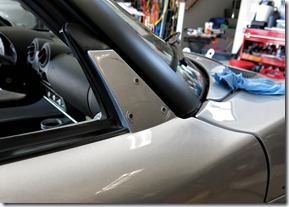
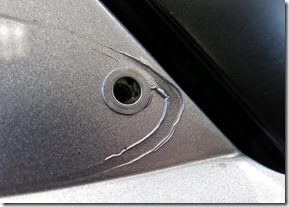
Mark sent the original mirrors along with the car. I decided to put them back on the Exige to see whether or not they provide better rear visibility. The Luftkraft mirrors were attached using rivet nuts. Re-attaching the original mirrors required drilling out the nuts and adding a larger diameter washers under the bolt inside the door. Neither of these tasks were simple or easy… but after a lot of hand wringing and only one washer lost inside the door it is done!

IMG_6540(2)IMG_6541(2)

The original mirrors extend much further out and the additional glass makes for a vastly improved view out the back. While it could be argued Mark’s mirrors are sleeker and more stylish I cannot imagine going back to them after driving with these!

Wednesday, May 28, 2014

Lycoming/Cord V-8

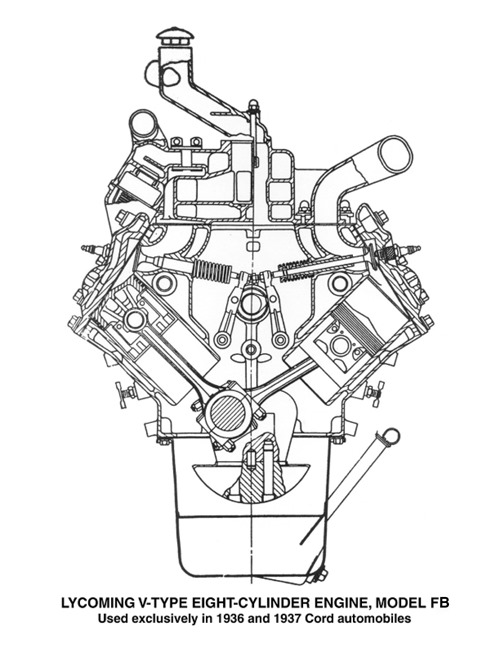
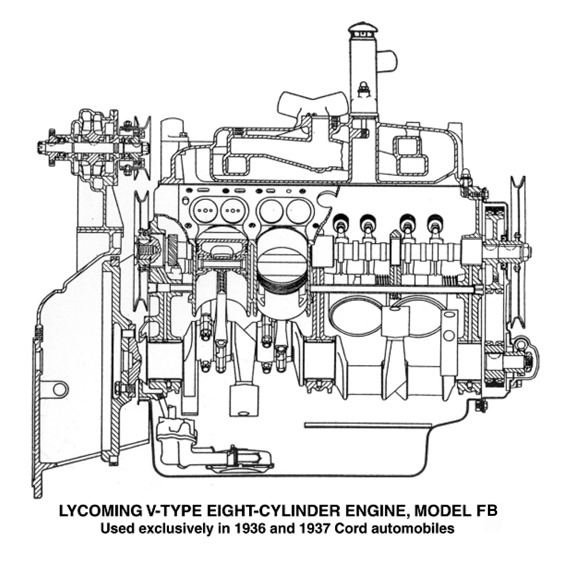
A cut-away drawing of the Lycoming/Cord and description from Josh Malks.

Lycoming Manufacturing, makers of engines for many makes of automobiles and aircraft, was a wholly-owned subsidiary of the Auburn Automobile Company. The Cord engine was the only V-8 Lycoming ever built.

It was a very modern powerplant, with almost 'square' bore and stroke and nearly-horizontal valves operated by roller-equipped rocker arms. Even the earliest engines were designed to accomodate the centrifugal supercharger that was offered as an option on 1937 models.


EngineX1

engineL1

Cord Transmission (Inspection)

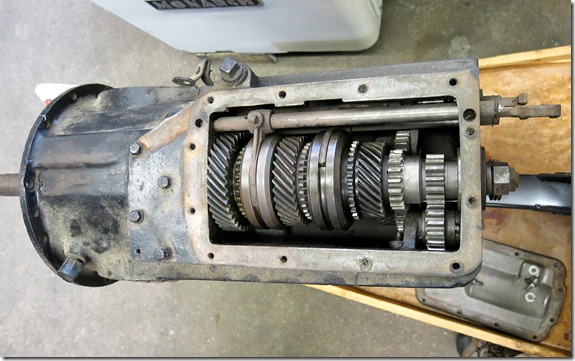
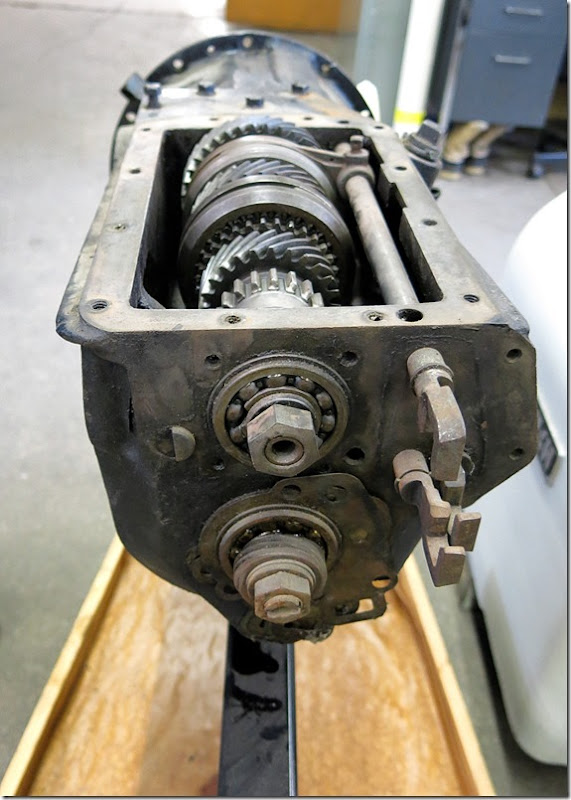
With work well under way on the Cord engine we are turning our attention toward the transmission that came along with the “Hatch” engine. A close inspection of the gearbox revealed enough wear on the gear train to force a rebuild of the shafting and gears. Installing new bearings and generally cleaning things up cannot be a bad idea.

IMG_6511(2)

IMG_6513(2)

Tuesday, May 27, 2014

1936 Cord Engine (Innards)

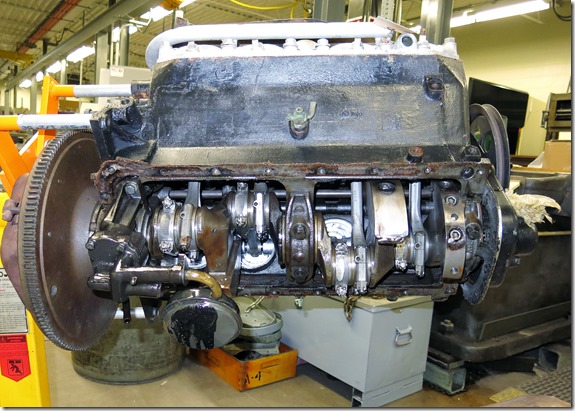
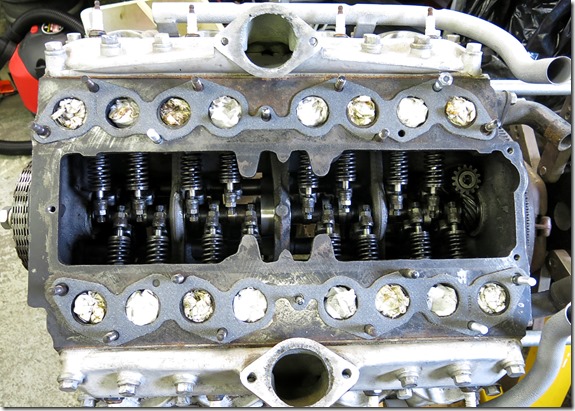
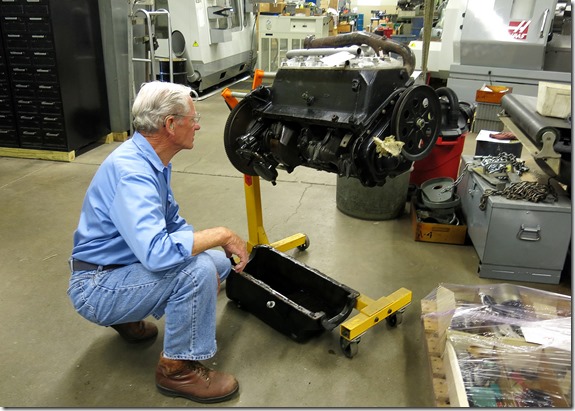
As we set about evaluating the “Hatch” engine for the 1936 Cord we decided to remove the manifolds from the top, oil pan from the bottom, flywheel and covers from both ends providing clear access to the crankshaft, camshaft, connecting rods & pistons and valve train. All of these elements look (and measure) to be in good shape.

img_3457(2)

IMG_6516(2)

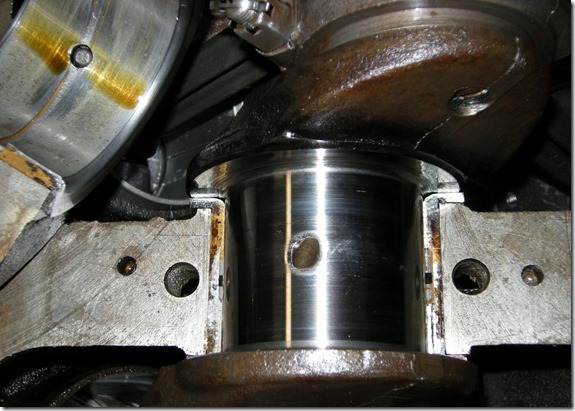
We also removed one crankshaft main bearing cap to have a look at wear on the main bearings. This babbitted journal bearing shows only ordinary wear and looks good.

FB 2077 013(2)

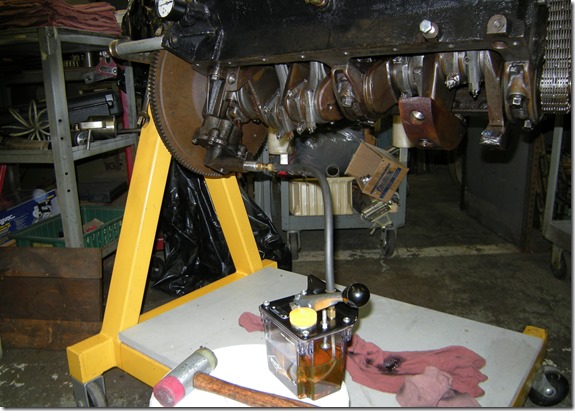
Finally… we attached an external pump to the oil pickup forcing good clean oil throughout the engine. Oil weeps out all the right places in the correct amounts convincing us that it all systems GO!

FB 2077 014(2)

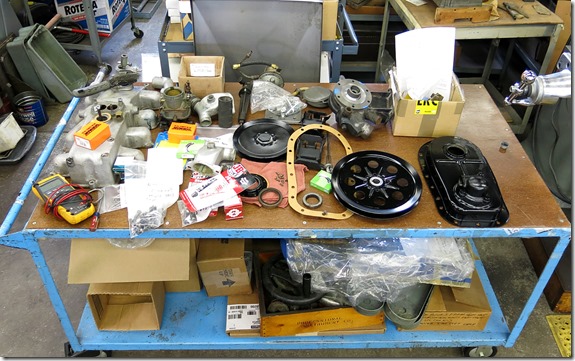
Our workbench filled with all the rebuilt parts and new materials…

IMG_6515(3)

1936 Cord Engine

At long last we are starting the process of getting my 1936 Cord 810 back on the road. For the last two years we have been busy organizing and selling off bits and pieces of my Dad’s vast collection of automobiles and parts. In the last couple of months we have finally organized things to the point where we are ready to dive into the engine and transmission we plan to fit to the “Brom” Cord. My Dad bought this engine from Al Hatch (in Detroit) almost 10 years ago. The engine came out of a Cabriolet Al purchased from an estate in the 1980’s and has only been driven 250 – 300 miles.

Eric Johnston removed the intake and exhaust manifolds from the top, and oil pan from the bottom to allow us to have a good look at the engine “innards”. Our friend Bob McNaughton stopped by to help us evaluate the condition of the engine. The crankshaft, connecting rods, pistons, camshaft, rocker arms, and valves all look fine. We found a few problems to fix related to the timing chain on the front and flywheel off the back but all things considered the engine looks good.

IMG_3458(2)

As of today the re-assembled engine is attached to our run-stand where Eric is preparing to “fire it up”.

IMG_6618(3)

Friday, May 9, 2014

Atlas Scissors Lift

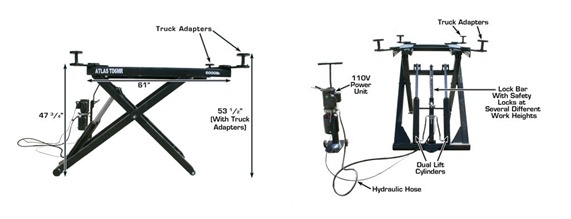
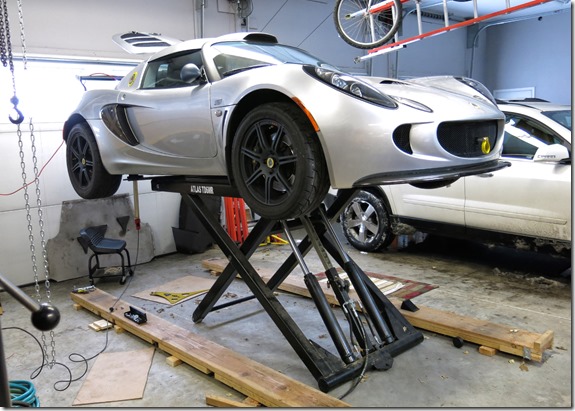
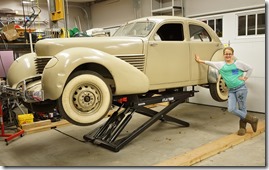
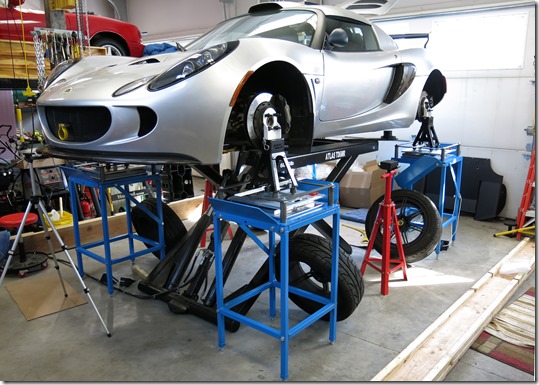
After carefully considering many options I purchased an Atlas Scissors Lift from Greg Smith Equipment to use in the third stall of the “L” Shaped Garage. The lift has proved to be remarkably versatile tool that not only makes car work easier but also provides an adjustable height base for a work surface.

Atlas Lift

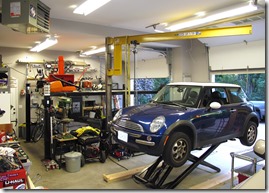
The two photos below show off the range of possibilities for using the lift nicely. In the first the 2008 Lotus Exige is lifted 48” off the floor. The second shows the adjustable work surface in use while building Nordic ski waxing stations.

IMG_5296(3)

IMG_1015(2)

The images below show the lift in use on a wide variety of jobs performed in the space (so far).

 garage 36 (1)IMG_2634(2)

IMG_5048(2)dsc02016(3)

IMG_5473(3)

Thursday, May 8, 2014

Remackel Trailer... The Best Tool Ever!

Earlier on these pages I started a list of "must have" tools for a well equipped garage. Creating the list inevitably caused me to reflect upon which I regard to be the Best Tool Ever. Taking a few important attributes of a great tool into account…

  • Number of times I use the tool
  • Number of times others ask to borrow the tool
  • Durability of the tool
  • Usefulness of the tool

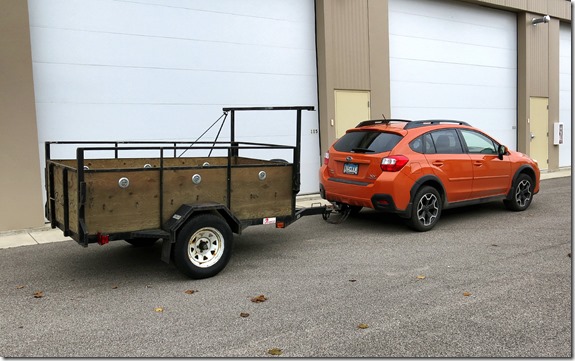
The utility trailer I purchased from Remakel Welding easily rises to the top of my list. I bought my trailer from Dennis Remakel almost 15 years ago. It has been a integral part of countless "big adventures" ever since. Dane Anderson says it best... "The Remakel trailer is a 1/2 ton pickup you can park in your yard that costs nothing to insure"

IMG_4439(2)

Tuesday, May 6, 2014

Park Place Storage Condominiums

15 years ago I purchased a storage condominium in Loretto, MN from Paul Jorgenson. The Loretto facility was his first foray into the Minneapolis/St. Paul market for "large, heated, storage you own". Park Place Storage has since expanded to five sites with plans to add a sixth in Cottage Grove. In the time I've been Paul's customer I've not only expanded the amount of space I own but also moved from the Loretto to Minnetrista locations.

The Loretto facility is located just north of Highway 55 on County road 19. The property has something like 320 units spread across 17 buildings.
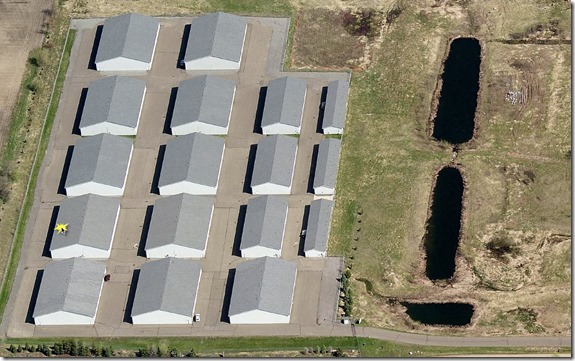
Loretto 1

A standard unit in Loretto is 18’ x 45’. I (eventually) owned three units… A “double” (two standard units without a wall in-between) and the “single” next door. Each unit has a 16’ wide by 14’ tall overhead garage door. The interior height is 16’. Each unit includes a 40,000 btu forced air furnace and a 60 amp electrical service. The buildings are well insulated and surprisingly inexpensive to heat in the winter months.
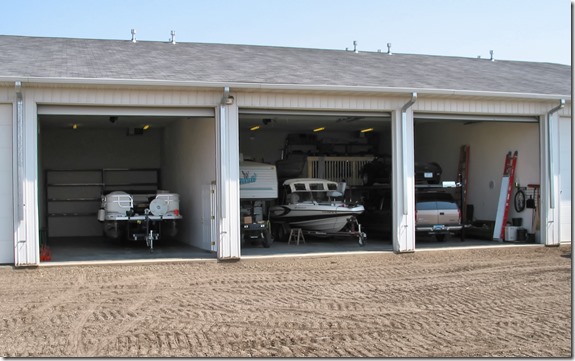
117-1705_IMG(2)

I “customized” the space by adding a mezzanine to the “double” unit and installed a four post lift. The 2,430 ft² easily accommodates our fifth-wheel trailer, 3 boats, a couple cars, and working area. the mezzanine provides ample additional storage space.
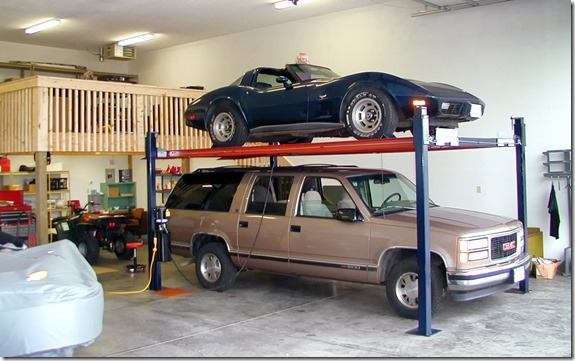
OLYMPUS DIGITAL CAMERA

Although I absolutely enjoyed my time as an owner in the Loretto association… I always wanted to own one of the 6o’ deep units Paul began building well after I originally bought in. In Late 2012 Paul offered me the opportunity to trade away my Loretto units for a pair of 24’ x 60’ units in their new Minnetrista facility. Even though I did not relish the thought of moving all the stuff from one place to the other I decided to do it. Paul has changed his “formula” significantly in the years since building in Loretto. The Minnetrista buildings are steel construction and include many more 60’ units. 

The Minnetrista facility will eventually house more than 400 units spread across 10 (or more) buildings. The grounds are fenced and the facility includes a meeting room, wash bay, and RV dump station.
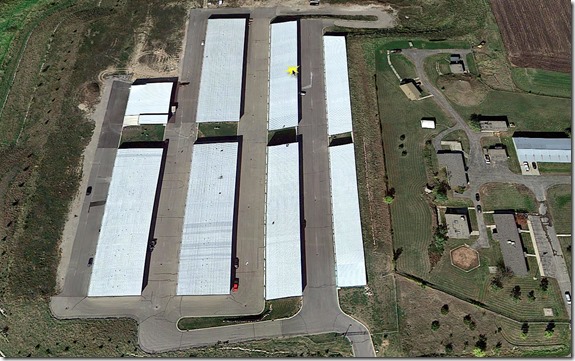
Minnetrista 1

The two facilities are almost 16 miles apart and even though Minnetrista is nearly 5 miles further it usually takes no more time to travel there from our home.
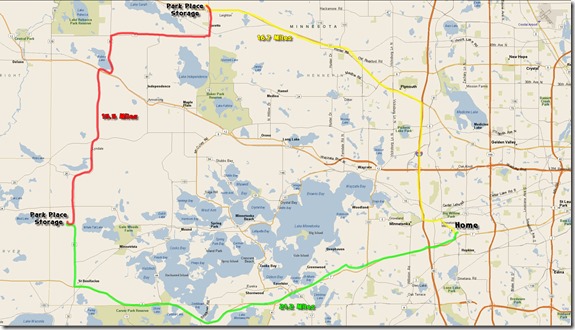
park place storage map

Fortunately Paul allowed me to take all the time I needed to make the move. We… Sam, William, Bjorn, Jane, Mara, Anna, Helen, Deb, and anyone else I could cajole, blackmail, etc… set about moving. The move took all summer!
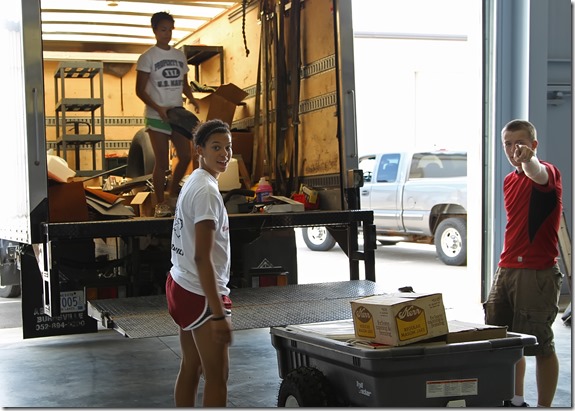
A26U9868(2)

So… Comparing the the two spaces using (Google/Trimble) SketchUp shows off a couple advantages to the 60’ Minnetrista unit. First… the extra depth easily accommodates parking a vehicle in front (or behind) a trailer. Second… The Minnetrista units are 24’ wide and include a man door. This is especially nice because you don’t have to open the garage door to get inside. The Minnetrista “double” is also 450 ft² bigger.
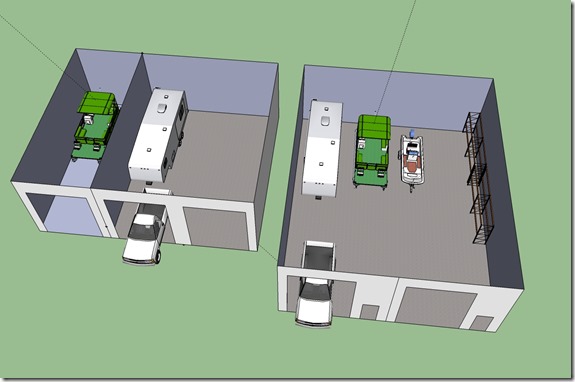
Storage Compare

SketchUp is a great tool for envisioning how the space will be used…
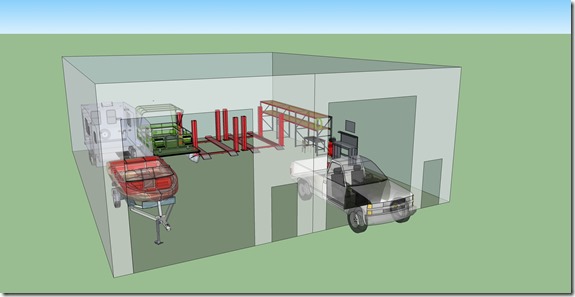
garage (x-ray)

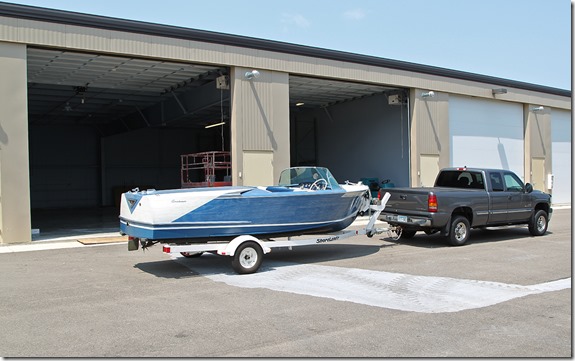
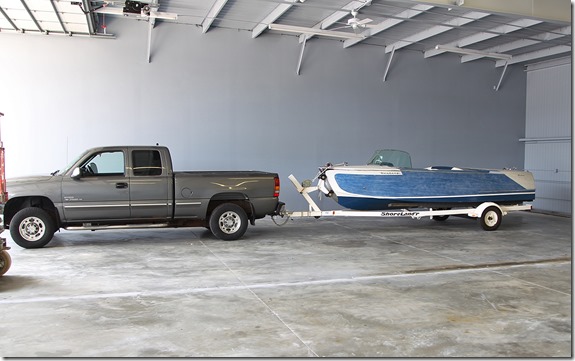
Our 1956 Century Arabian was very first item moved to Minnetrista. The second image below shows just how spacious these new units are inside.
A26U9072(2)

A26U9085(2)

I thought I should include here a photo taken in the Minnetrista space before all the stuff arrived.
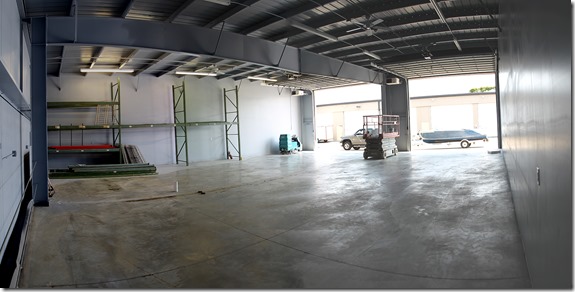
St Boni Panorama

And another as we neared the end of the move…
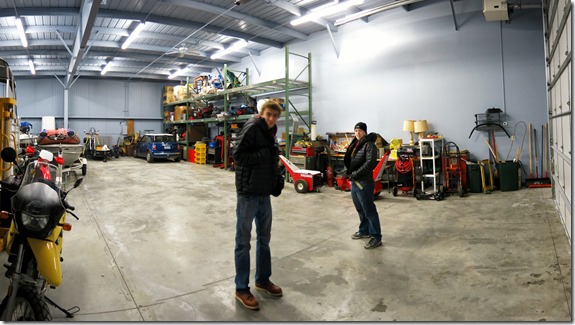
Park Place (Bjorn and Sam)

Monday, May 5, 2014

Detailing Cars… with Dan Noraker

I sent my new Chevrolet SS off to Dan Noraker to be detailed and Opti-Coated. Dan runs an auto detailing business out of his garage in Coon Rapids where he works on a steady stream of nice cars. Dan “corrected” and polished the paint before applying the Opti-Coat ceramic clear coating. The photos below show off his work nicely.

SS (enhanced_yellow)

4G3A4549(2)

Sunday, May 4, 2014

Milling Machine (setup)

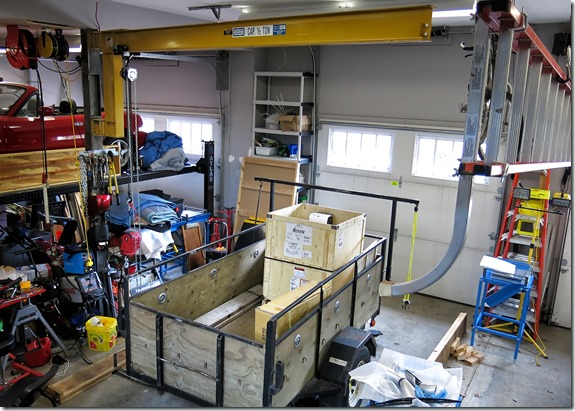
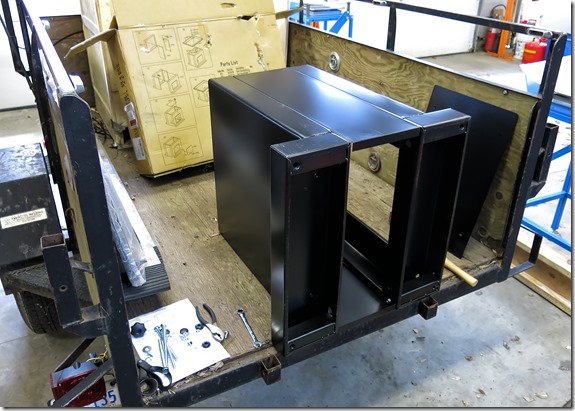
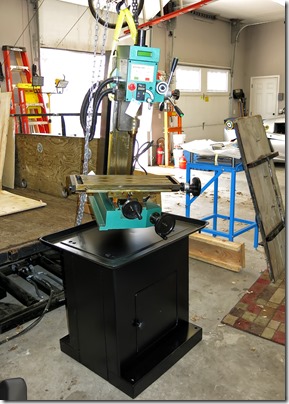
I finally got around to unpacking and setting up the Grizzly Milling Machine. I brought the crate home in the Remackle trailer along with the stand I decided to by from Grizzly. The jib crane in the garage makes this sort of operation fast, easy, and safe.

IMG_6521(2)

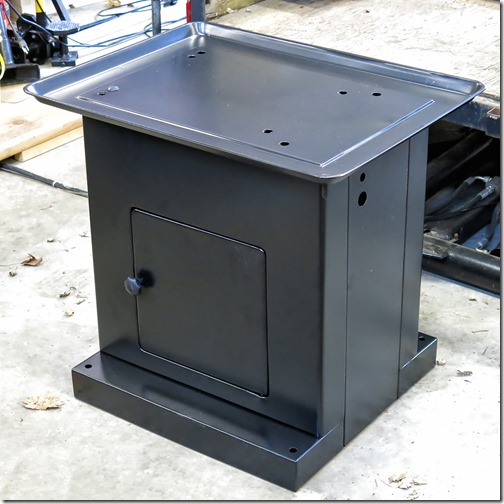
First up assembly of the Grizzly machine stand (Part # G5944). The stand is light weight but surprisingly stable and well built.

IMG_6523(2)

IMG_6527(2)

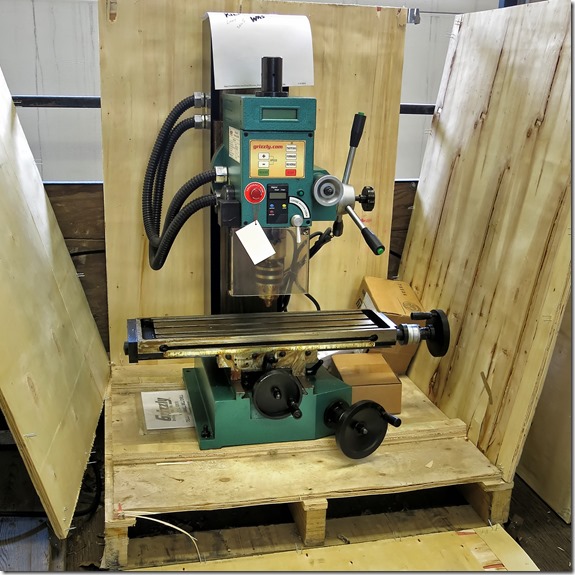
Next disassemble the shipping crate to reveal the Grizzly G0619 milling machine. The machine and crate arrived in good shape with all the parts nicely packaged.

IMG_6528(2)

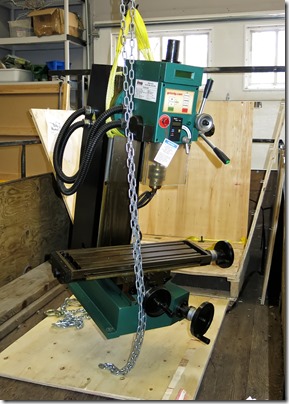
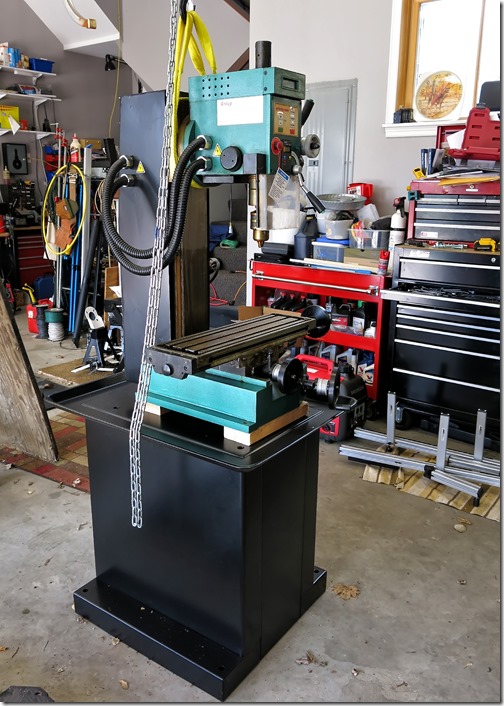
A single strap wrapped around the spindle casting provided a nicely balanced lifting point for the chain hoist. lifting the machine off the pallet and moving it to the stand could hardly be easier.

IMG_6531(2)IMG_6532(2)

I’ve temporarily left the mill sitting on a couple of 2 x 4’s  as I decide exactly how to make a base under the mill to provide clearance for the vertical hand wheel. I think I’m going to make a simple wood base that raises the machine almost 3” higher than the stock height.

IMG_6535(2)