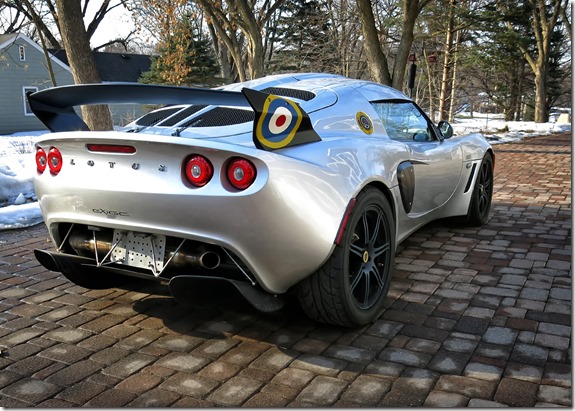
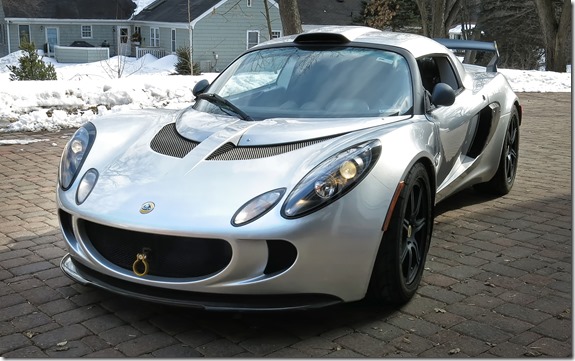
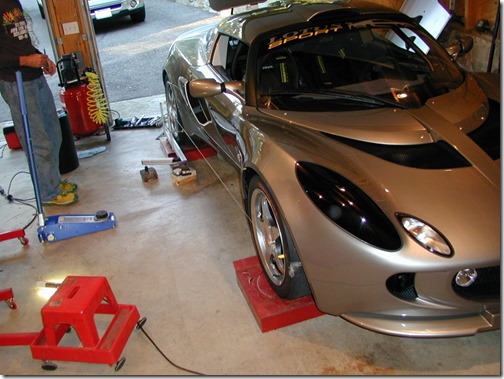
I took the Lotus on a first drive around lake Minnetonka early Saturday (March 29) morning. The morning temperature was right around 20° and the roads nice and dry. I did hit a few ice patches but was able to weave back and forth around the potholes and salt piles. All-in-all a very nice introduction to driving the car.
Monday, March 31, 2014
Monday, March 24, 2014
Lotus Wheel Alignment (Flyin’ Miata)
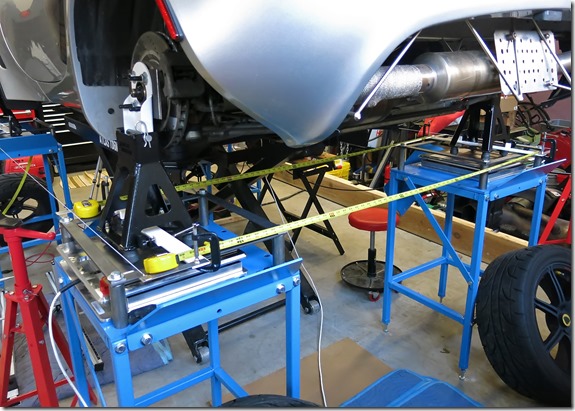
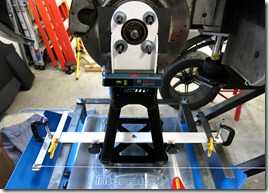
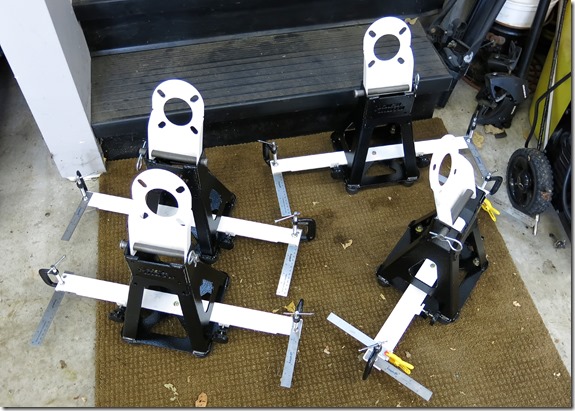
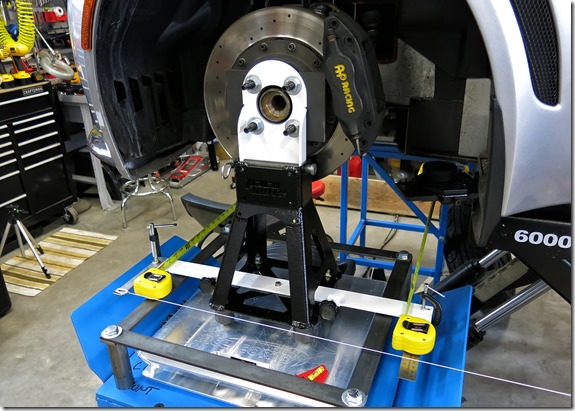
So… with the ride height and corner weights set and a preliminary set of alignment values I set about switching out the wheels for the Flyin’ Miata hub stands. While the hub stands have some big advantages (as we’ll see in a moment) setting ride height and corner weights on the stands would require some sort of “conversion” to account for the height of the stands and “rolling radius” of the tires (it’s not 1/2 the diameter and depends on tire pressure). Fortunately the combination of a scissors lift and wheel stands makes switching over to the hub stands quick and easy. The image below shows the Toe Bars on the hub stands with Carl’s thrust angle string system installed.
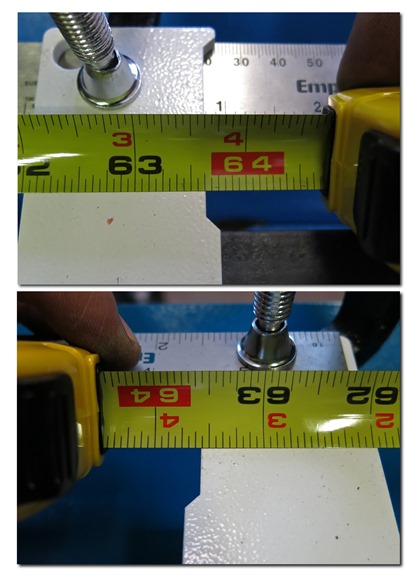
The first order of business is re-calibrating all four Toe Bars from the wheel hubs…
Then setting up to measure toe using tape measures between the hub stands underneath the car, and thrust angle using the strings.
The first round of hub stand Toe and thrust angle measurements agreed reasonably well with the values recorded from the ART laser toe gauge. In fact the measurements from the rear were nearly exactly the same (Toe IN: .062”) while the front showed a larger Toe OUT condition (.25” vs .20”). While I can not explain exactly why this occurred at least it showed the the error in the same direction… just a little more of it.
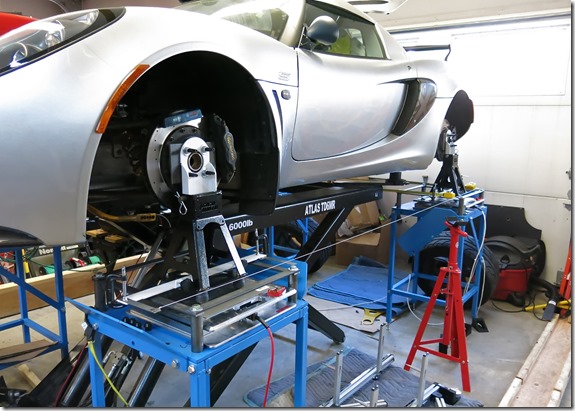
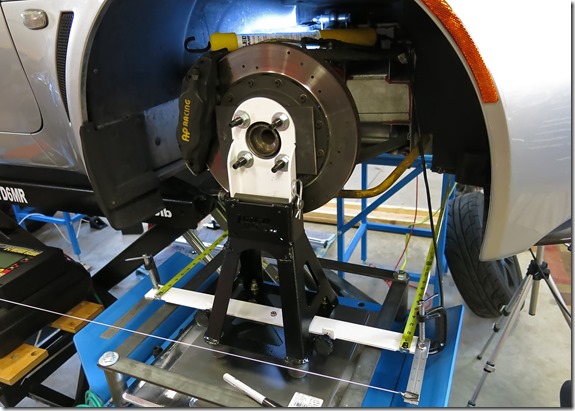
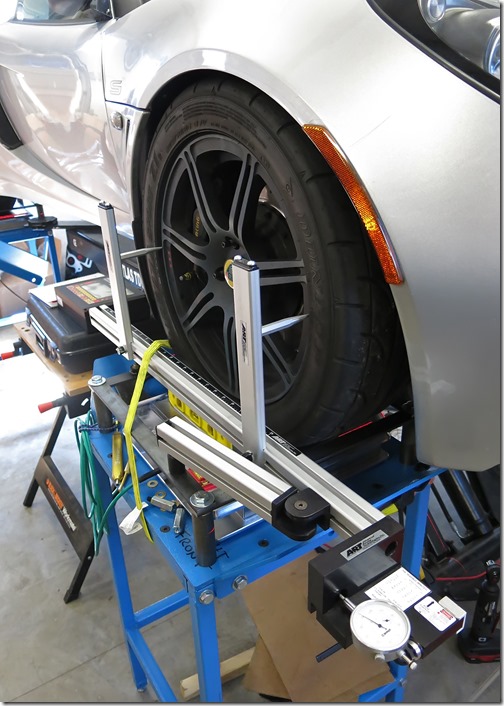
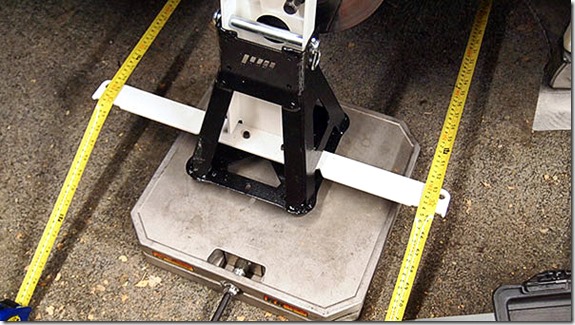
The image below shows the Flyin’ Miata hub stand system in place on the front right corner of the Lotus Exige.
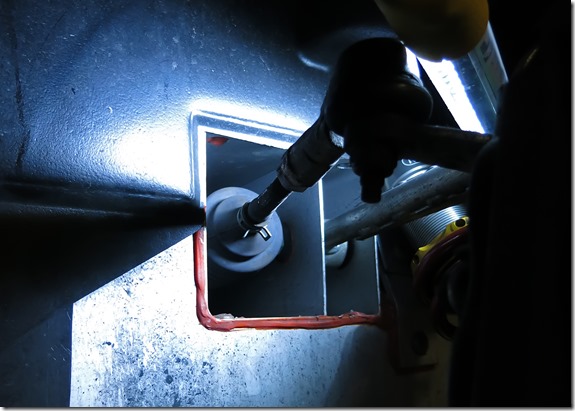
By moving around the car a few times taking Toe angle measurements from the hub stands… I made sure the measurements repeated nicely. I then decided to bust out a set of wrenches to adjust the front tie rod ends and bring the front wheels into alignment.
Having the thrust angle strings right there in front of you while making adjustments to the tie rods is very nice. The fact that you can reach down and check the tape measurements anytime as well makes this process fast, intuitive, and confidence inspiring. With the car at waist level and wheels of the way the task is almost too easy. A couple of trips from side to side and about 3/4 of a turn with the wrenches brought the front wheels into alignment.
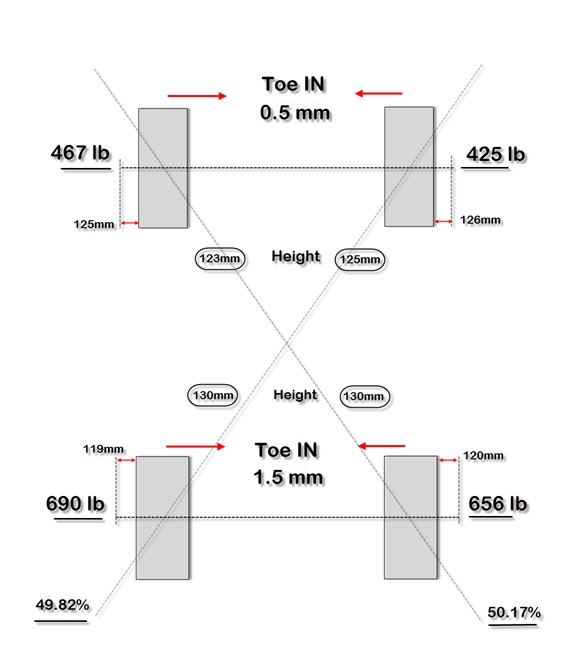
With the rear wheels consistently measuring Toe IN: 1.5mm I decided to leave them alone and moved on to removing the hub stands and putting the wheels back on the car for one last measurement with the ART Laser Toe Angle Gauge.
The results…
- Front: Toe OUT: .5mm (2 minutes)
- Rear: Toe IN: 1.5mm (12 minutes)
Or…
Lotus Wheel Alignment (Height, Weight, ART)
Setting up the “L” Shaped Garage to facilitate wheel alignment caused me to purchase the Atlas wheel stands, Intercomp race scales, and ART laser Toe Angle Gauge. To align the Lotus Exige in particular I purchased the Flyin’ Miata hub stands. While the journey so has been interesting and fun the time has come to get to work and actually align a car.
In the interests of full disclosure… I’m writing this blog entry shortly after completing the wheel alignment on the Lotus. The process I’m going to describe here includes a number of additional steps included in this first effort. Specifically I chose to work from from both the Flyin’ Miata hub stands and also traditional “slip plates” in an effort to compare and contrast both the effort involved and the results.
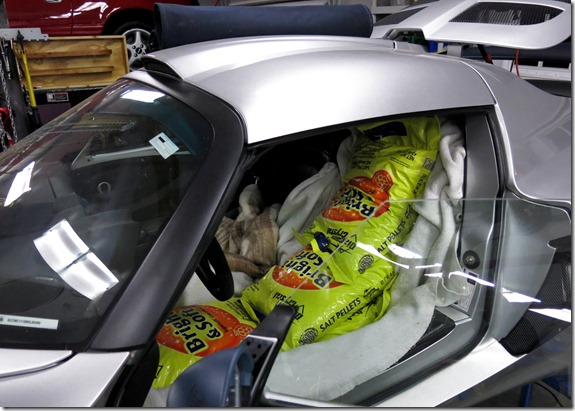
As a first order of business I added weight to the drivers seat and disconnected the front sway bar. I used 40 lb. bags of water softener salt to ballast the drivers seat with 200 pounds of weight. The salt bags allow you to distribute the weight across the seating position nicely.
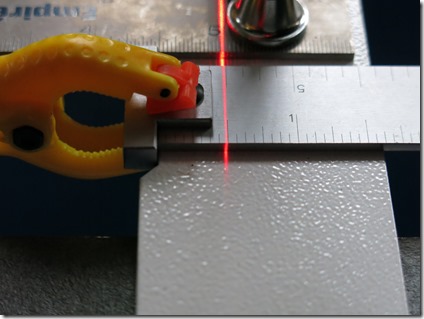
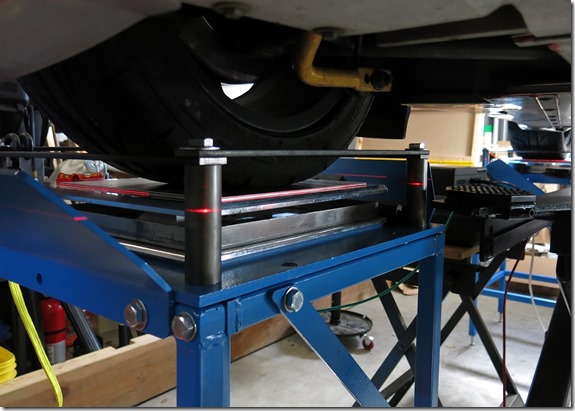
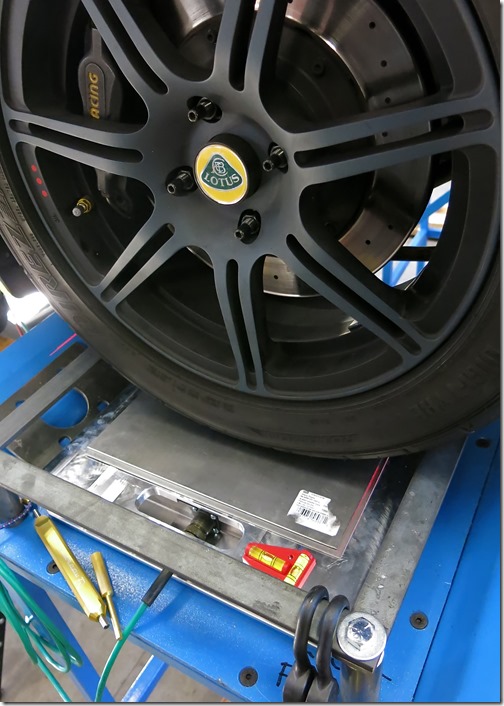
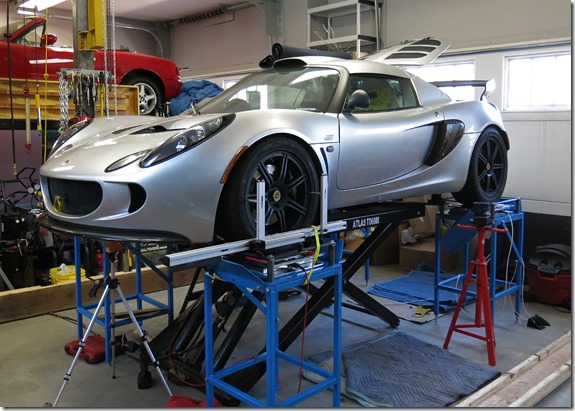
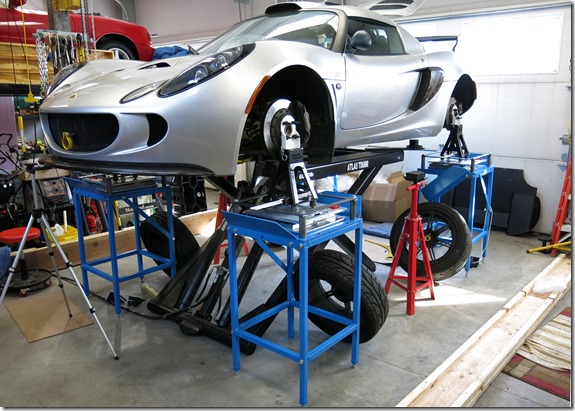
The Lotus Exige has a new set of adjustable suspension dampers (shock absorbers) and requires not only a wheel alignment but also ride height adjustment and corner weighting. The first step is to get the wheel stands leveled and the tops of the race scales all in the same plane. The first image below shows the left front stand with a race scale, and slip plates under the front wheel of the Lotus. Here you can see the line from the laser level striking the exposed perimeter of the top slip plate at both the front and rear wheels. The laser is a very convenient way to get the stands set up and close to level.
To ensure the wheel stands are level I have a small two-axis bubble level on top of each scale and also employed a long (78”) carpenters level between the stands.
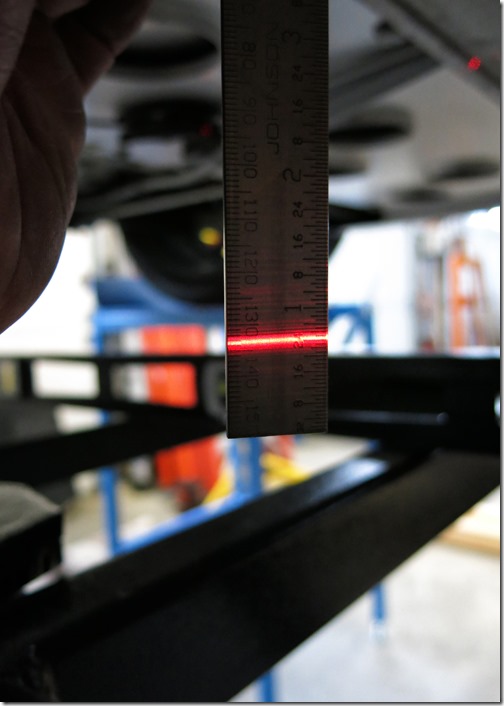
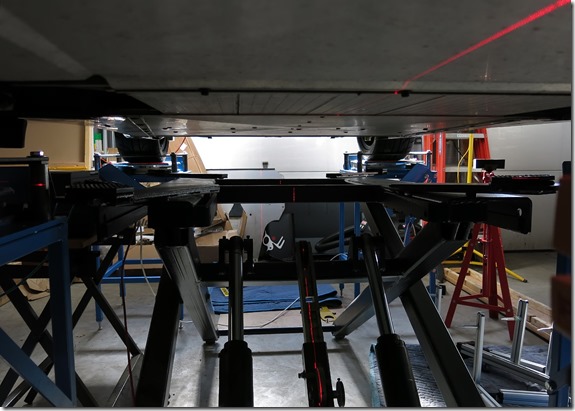
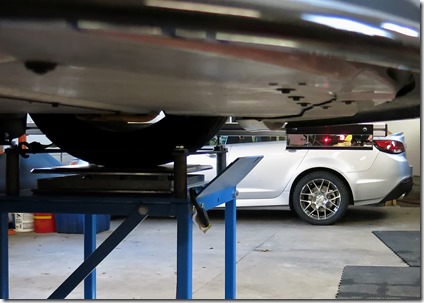
With the stands leveled and a line level in place under the car we can now measure ride height with a small square. Lotus identifies four positions on the chassis where ride is measured. Holding the square up against these spots allows us to directly measure ride height at each position.
As seen here… There is plenty of clearance under the car to make these measurements.
Setting the ride height and corner weights is an iterative process. I first made sure the spring perches on the front and rear dampers were set to approximately the same position on the shocks. Then set the car down on the wheel stands and took a first set of ride height measurements.
Next I lifted the car… removed the wheels… and made changes to the position of the spring perches to drive the ride heights up or down paying little (if any) attention to the corner weights. In the case of the Lotus I was able to get the ride heights where I wanted them on the second time through the process.
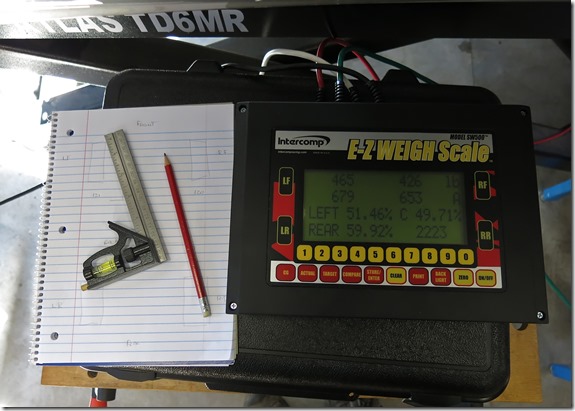
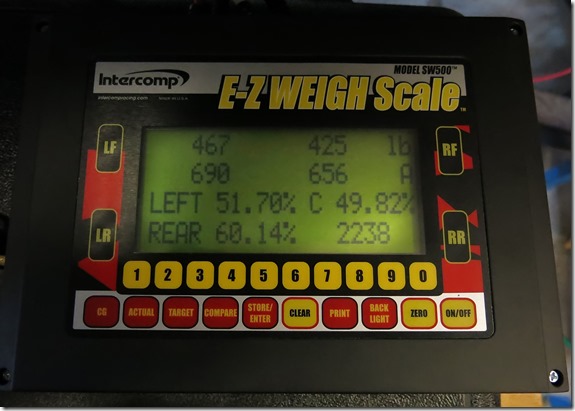
On the third pass through this process I made spring perch adjustments meant to drive the cross corner weights toward 50%. That is… I focused my attention on the scale readings largely ignoring the ride heights. This third iteration resulted in an 8 lb. difference (49.8%). Plenty good for now.
With the ride height and corner weights close I moved on to taking a set of alignment measurements using the ART Laser Toe Angle Gauge. The front wheels measured Toe OUT: 41 minutes… The rear Toe IN: 12 minutes. This works out to something like .20” (5mm) Toe OUT front and .06” (1.5mm) Toe IN rear.
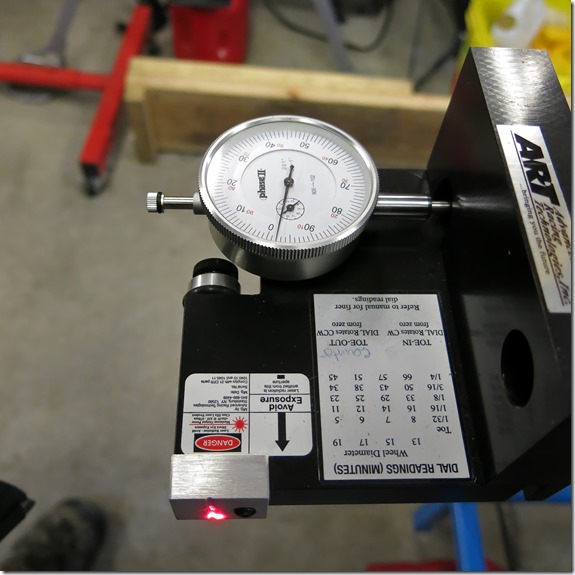
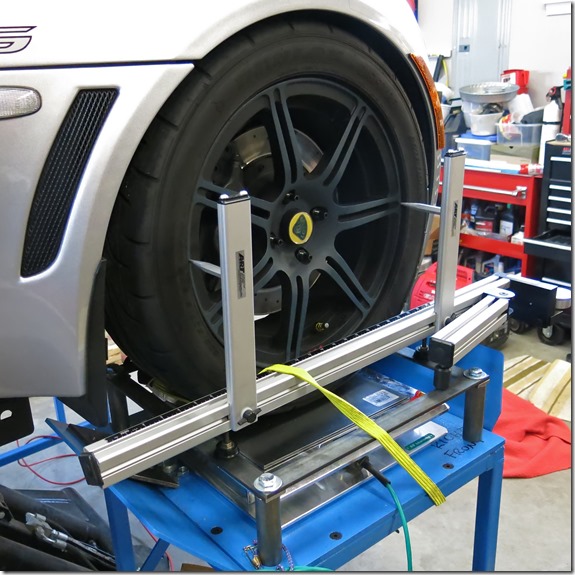
The ART system sits nicely on top of the guards built for the wheel stands and is a very nice way to quickly measure Toe Angle on a vehicle. It is important to note that it does not tell you anything about thrust angle and requires the wheel remain in place on the car. Although adjusting the tie rod ends is probably possible with the wheel installed on the car it would certainly be difficult on a vehicle with as little space underneath as the Lotus.
ART Laser Toe Angle Gauge
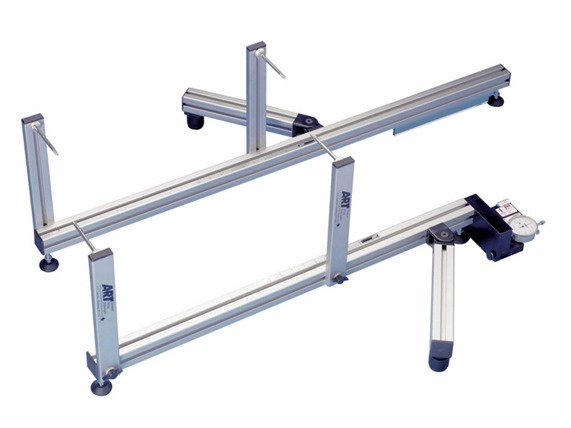
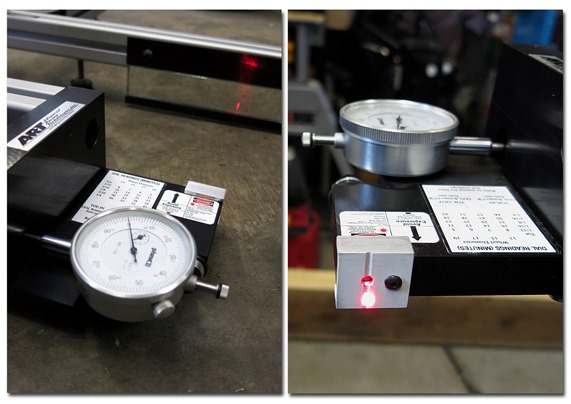
Advanced Racing Technologies (ART) sells a very nice laser Toe Angle Gauge. I purchased a (slightly) used one off of a Porsche website to provide an independent way to measure toe angle. Carl Schulhof uses this gauge and his thrust angle strings as he aligns a vehicle. The gauge directly measures the angle between two wheels on opposite sides of a car using a laser (pointer), mirror, and a dial indicator on a pivot. It is very simple and easy to use.
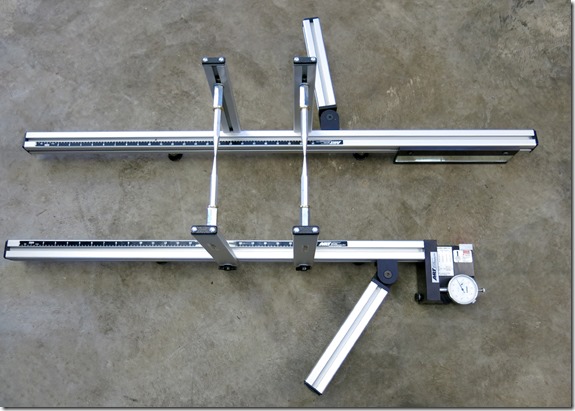
The gauge has two rails. Each of the rails has a set of adjustable pins that engage the face of a wheel. To use the system you first (roughly) set the both of the rails so that the pins contact the wheel thru the centerline of the wheels. It is important to have the rails approximately parallel.
With the rails “roughed-in” you then set both assemblies on a flat surface and align the pins so that they can brought into contact (ends touching) with each other. This ensures that the two sides of the gauge are exactly aligned.
With rails aligned the laser shoots across the gap… and then bounces back (off the mirror)… Showing up on the target above or below the “shutter”. You then adjust the pivot mechanism to line the laser up in the groove on the target and set the dial indicator to “zero”.
Then place the calibrated components back on the wheels ensuring that the “return” laser beam from the mirror is in the same plane as the target (a piece of black construction paper works well for this). Now you “move” the laser spot until it aligns with the target using the adjustment knob on the pivot. The pivot on the gauge is designed such that .001” on the dial equals 1 minute of angle (60 minutes = 1 degree). Clockwise motion is Toe IN… Counterclockwise Toe OUT.
As I worked on the front end wheel alignment on my Lotus I measured the final wheel alignment to be 2 minutes Toe OUT (approximately .010” on a 17” wheel). It is easy to see why our friend Carl likes this gauge… It works well and inspires confidence.
Friday, March 21, 2014
FM Hub Stands… Thrust Angle?
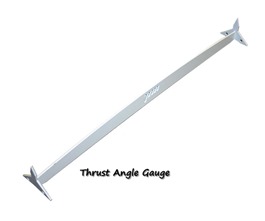
After the long involved posting earlier it seems appropriate to spend a few minutes talking about thrust angle and how it relates to the Flyin’ Miata hub stands. The good folks at Flyin’ Miata used to offer the thrust angle gage pictured below. It was meant to be aligned to the centerline of the vehicle chassis and referenced while measuring toe with the hub stands. They recently discontinued selling it because it was not easy to use accurately. The image on the right shows the FM hub stands “enhanced” to facilitate thrust angle measurements.
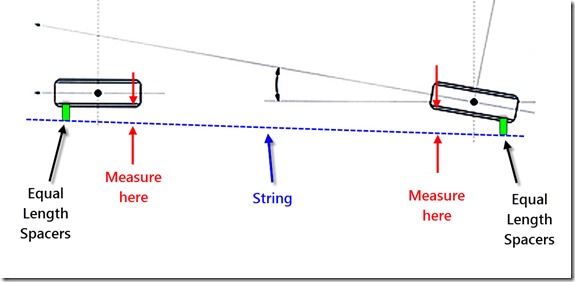
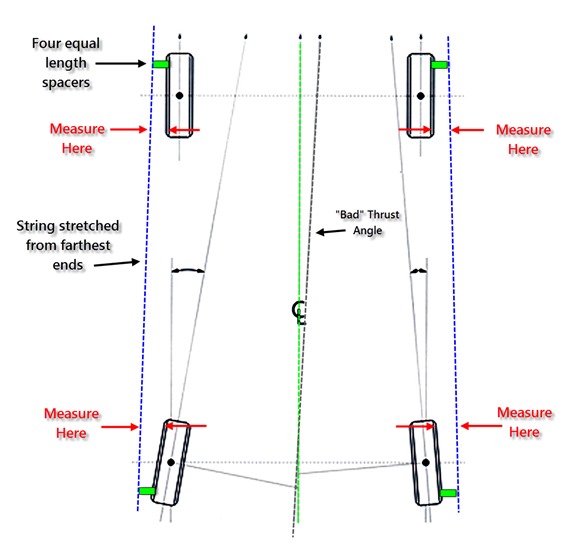
Fortunately Carl Schulhof's string method for measuring thrust angle is easily adapted to the FM hub stands. The diagram below shows the details of Carl’s system with the equal length spacers supporting the strings at the “outboard” ends of the wheels and the measurement points in between.
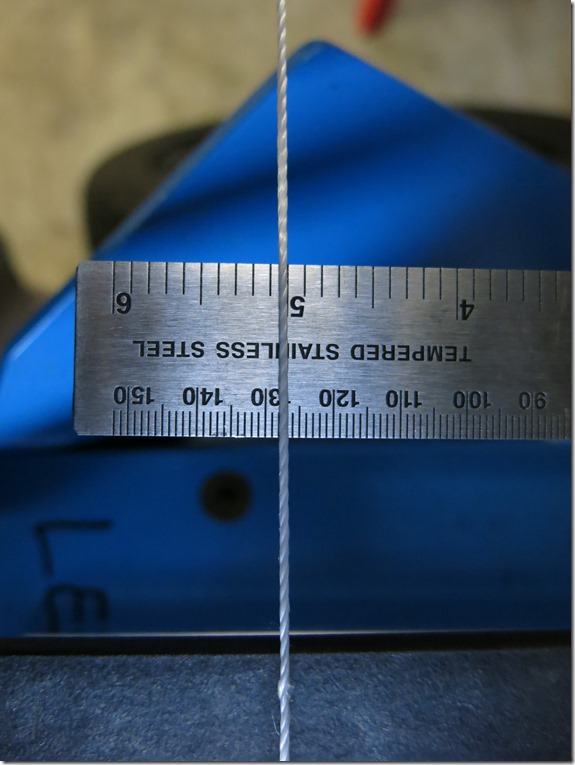
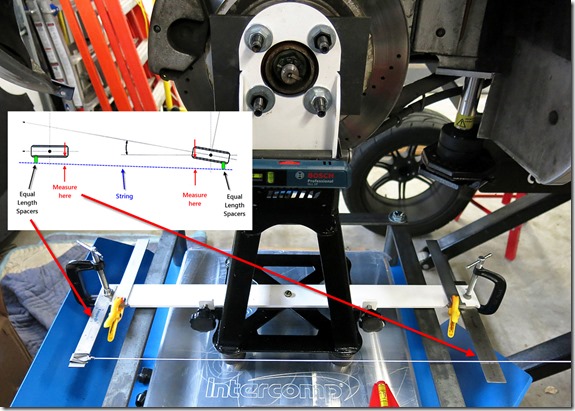
The image here shows Carl’s thrust Angle string setup implemented on the Flyin’ Miata hub stands. The steel ruler at the far left hand side takes the place of one “spacer” while the ruler on the right is the measurement point for the front wheel. The rulers are aligned with the measurement points on the toe bars that we calibrated earlier. We set the string the same distance from the measurement point at all four corners and simply read the numbers on the (measurement point) rulers at the right.
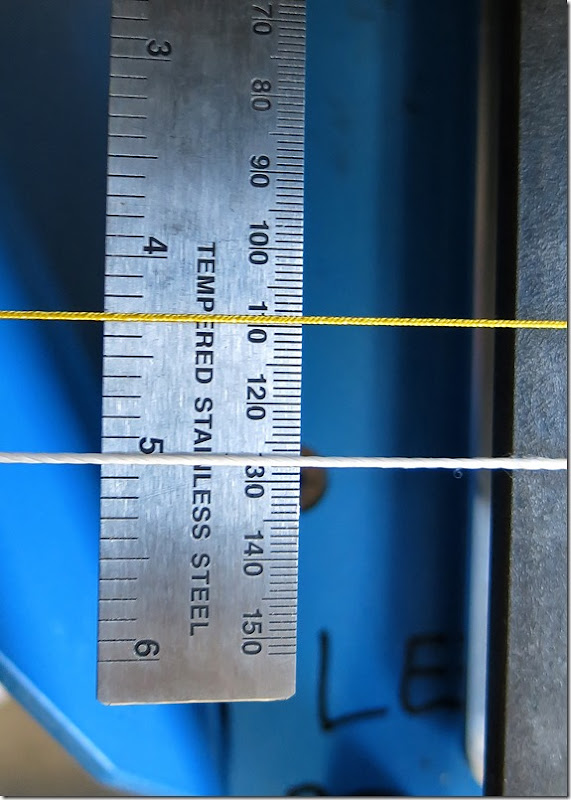
As seen here… reading the strings on the rulers works very well.
All of the elements of this system are fastened directly to the hub stands which makes removal of the system no more complicated that unbolting the hub stands and setting everything aside. Furthermore when the system goes back on the car it stays remarkably well calibrated.
FM Toe Bar Calibration
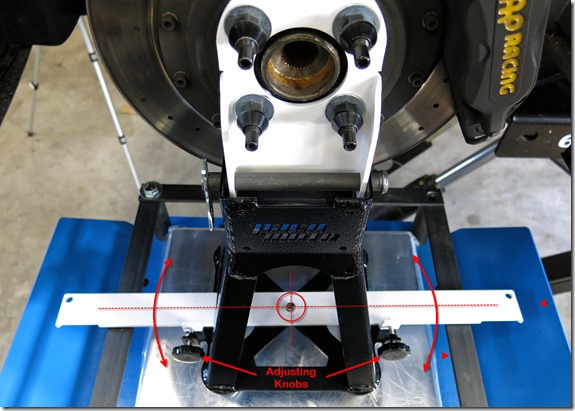
The Flyin’ Miata hub stands facilitate toe measurements using a tape measure underneath the suspension components and body parts. The tape is stretched between the bars on opposite sides of the vehicle. First you have to “calibrate” the bars…
With the hub plate attached to the axle you pivot the bar using the adjusting knobs to make it parallel to the wheels (as shown below) . Flyin’ Miata recommends using a laser pointer held against the face of the wheel hub as a reference.
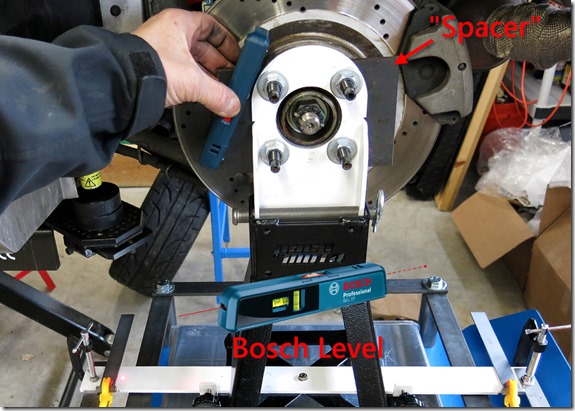
After quite a few “fits and starts” I’ve developed a calibration routine that works well for me. Instead of reviewing all my failed efforts I’ll just jump ahead the successful one here. The calibration of the FM toe bar required making a set of “spacers” to clamp between the hub plates and hubs to create a large stable base for the laser line level. Purchasing a high quality Bosch line and point laser made a huge difference as well!
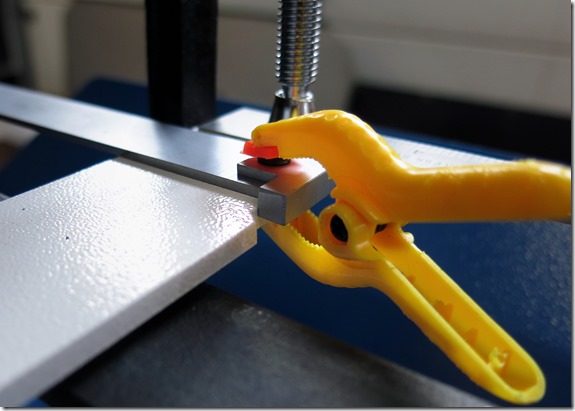
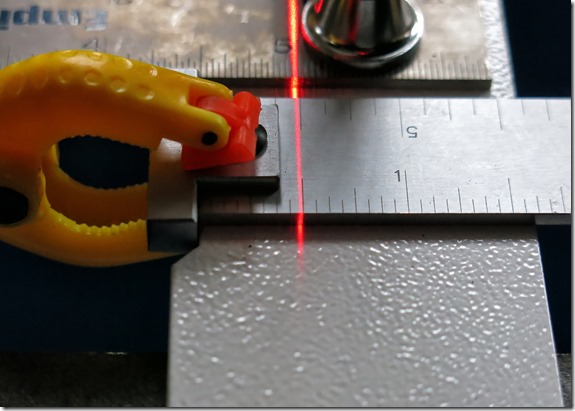
Clamping a set of hook rulers to the toe bar measurement points and using the “trailing edge” of the laser line results in the high visibility and repeatable results shown in the images below. Especially important is fact that this “evolved” system allows the user to operate in a nearly “hands free” manner while adjusting the bar.
With the toe bars calibrated it is on to measuring toe!
Flyin’ Miata Hub Stands
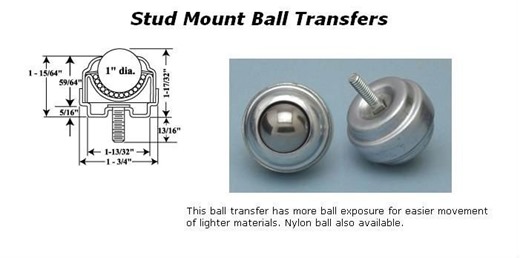
After carefully considering a few options I decided to purchase a set of hub stands from Flyin’ Miata. Their stands are relatively inexpensive and include a few very interesting features. The Flyin’ Miata stands consist of a welded steel base and adjustable “toe bar” coupled to a pivoting hub plate. The stand sits on four ball transfers and supports 1000 lbs.
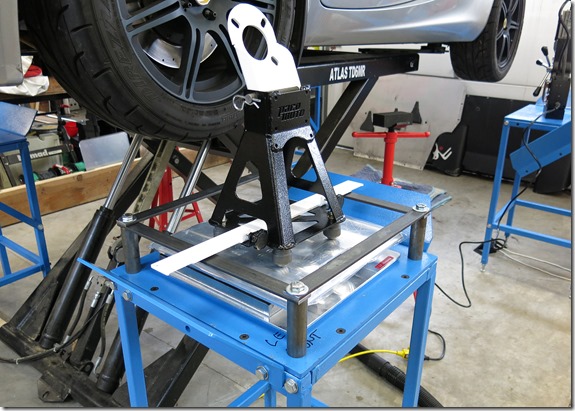
The hub stands sit nicely on top of my race scales and the guards I built for the wheel stands prevent them from rolling off on to the floor.
The image below shows the Lotus sitting on hub stands on top of the wheel stands. The ball transfer bearings and pivoting hub stand allow the suspension of the car to “settle” into place on the wheel stands as the car is lowered on to the scales. The car moves around very freely on top of the scales… so freely it is kind of scary!
The welded base of the Flyin' Miata stands is a fairly compliant structure. When the weight of the car is applied to the stand... the base twists ever so slightly allowing the four balls to contact the plate. With the structure "pre-loaded" in this manner all four balls come in contact with the surface (sharing the load) while the stand is supported in a way that is rigid in the directions that matter. I don't know if the Flyin' Miata folks purposely designed it this way or if it's a happy accident but is actually works very well. The limits of this kinematic structure are determined by the flatness of the aluminum plate. That is... if the plate were to have a "hole" greater than the motion allowed by the base one of the balls would come out of contact.
Hub stands
All of the methods for measuring alignment we just looked at have interesting advantages and disadvantages. It is clear that while some of the methods work well to check an alignment they are deficient while performing one. It is also true that there are different sorts of alignments to be had. The alignment I hope to perform on my Lotus Exige requires setting… ride height, corner balance, camber, toe, thrust angle, and steering center. For many other vehicles ride height and corner balance are not adjustable and therefore not a part of an alignment. The Lotus also has a four wheel independent suspension that provides opportunities to adjust the rear wheel, camber, toe, and thrust angle.
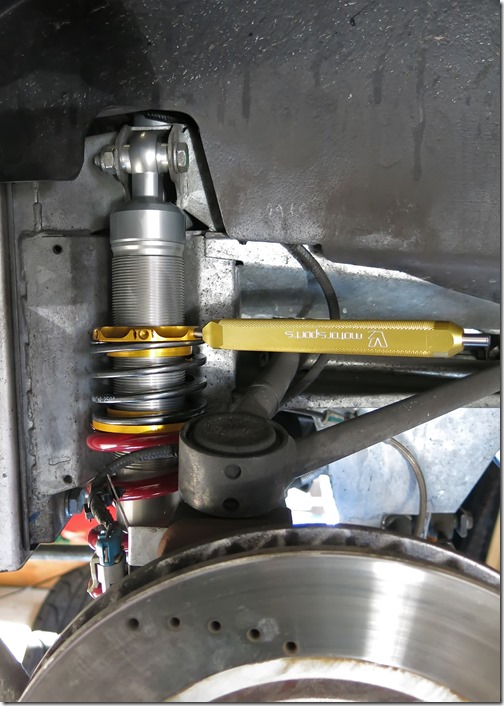
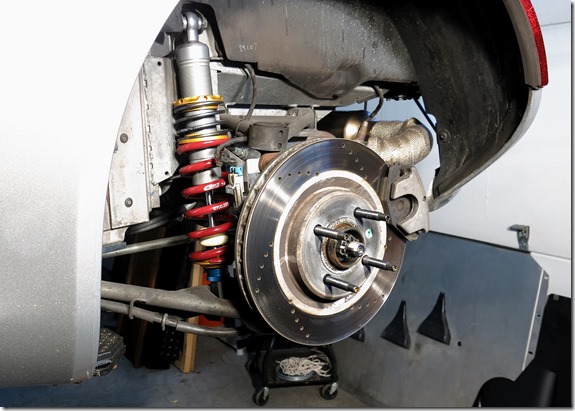
Adjustments to ride height and corner balance require clear access to the spring dampers (shock absorbers). The lotus in particular provides very little room to work on the suspension with the wheels in place on the car. The image below shows the rear suspension of the Lotus. With the wheel removed the adjustable spring perch is easily accessed.
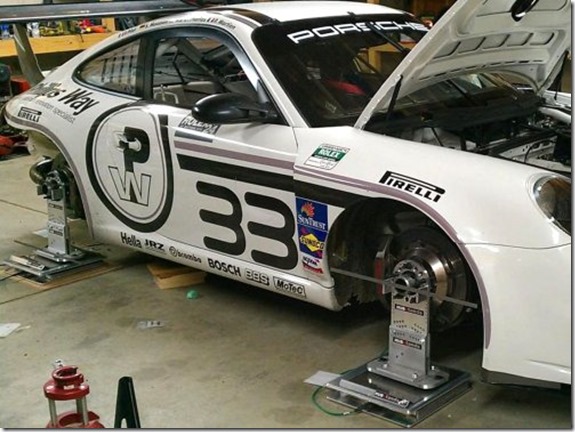
Because of this many folks are drawn toward using Hub Stands when performing alignments. Usually a set of four stands are bolted to the hubs in place of the wheels. The stands usually include some sort of bearing surface for the vehicle to rest upon. Hub stands provide clear access to the suspension components in the wheel wells. The image below shows a set of stands from BBX Racing attached to a Porsche.
BBX Racing advertises their stands with the following statements…
On HUBStands, you only need to take the wheels off once to Corner Balance, Align and completely Set Up your car. With the wheels out of your way, you measue and precisely set everything directly at each hub. On a set of HUBStands, you eliminate all of the endless jacking, car rolling, wheel wrestling; and all of the tire variances. Everything is done far faster and set to far tighter, repeatable tolerances than can ever be done at the wheels and tires or on cheap, stamped steel stands.
Carl Schulhof & Thrust Angle Measurement
Reading through the pages of lotus Talk inevitably brings you to not only many different implementations of the string method for wheel alignment but also to Carl Schulhof's ingenious system for measuring thrust angle using strings. Like many others I was initially confused because he implements strings to measure thrust angle. His method is so ingenious in fact; it took me an embarrassingly long time to figure out that thrust angle is what he's actually measuring.
Watch Carl explain his methods in a seminar at Sector 111 here…
Carl's stretches his strings from the back edge of the rear wheel to the forward edge of the front. He spaces the string off the face of the wheels using equal length stand offs. He then works until the faces of the wheels are evenly spaced from side to side. Importantly he measures toe using a completely different tool.
The diagram below shows his technique set up on a vehicle with a misaligned left rear wheel resulting in a improper thrust angle. Measuring at the distance from the strings to the wheels as shown exposes this misalignment and the thrust angle variation.
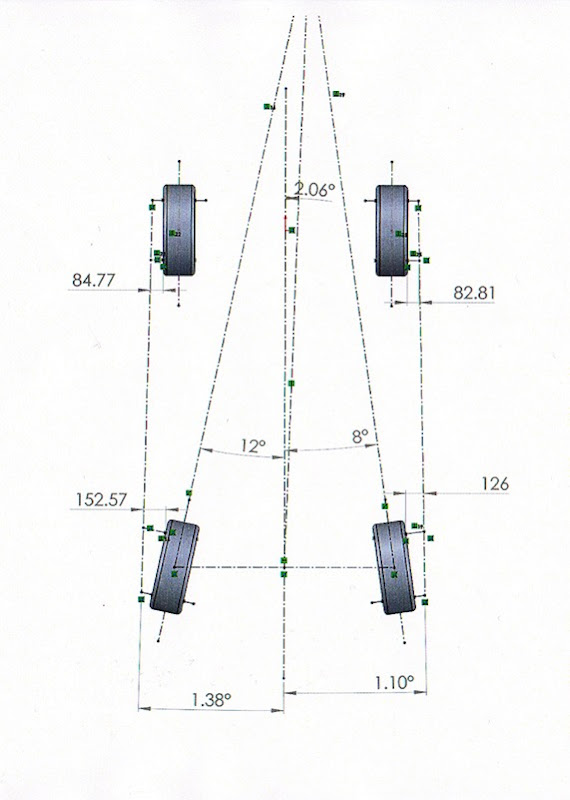
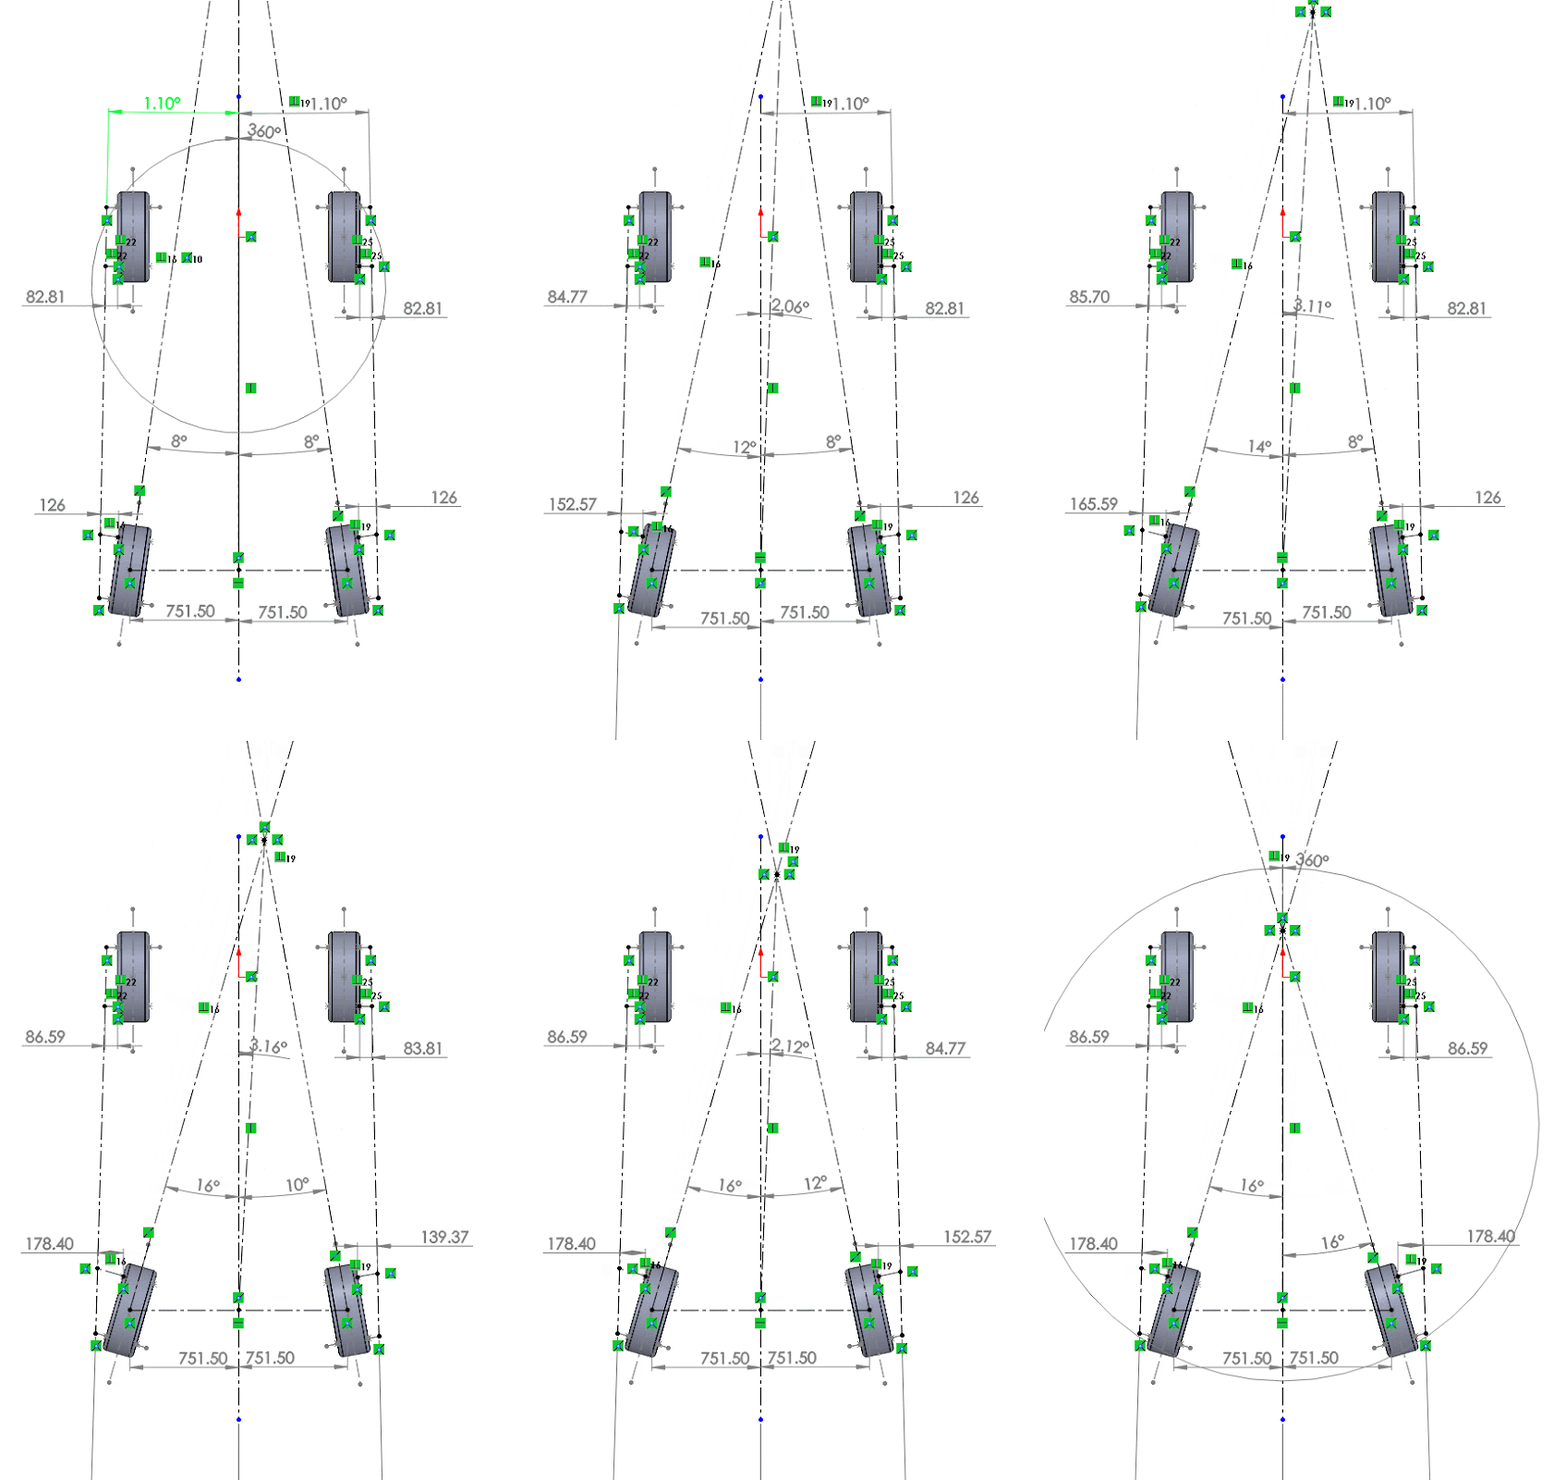
In an effort to better understand how his technique works I had PICo’s Chief Engineer Dan Oss put together a 3D model of the Lotus Exige suspension to play around with. The real genius is that the only condition that exists where the measurements from the strings are equally spaced (side to side) is when the thrust angle is "0". The first image below shows the misaligned condition.
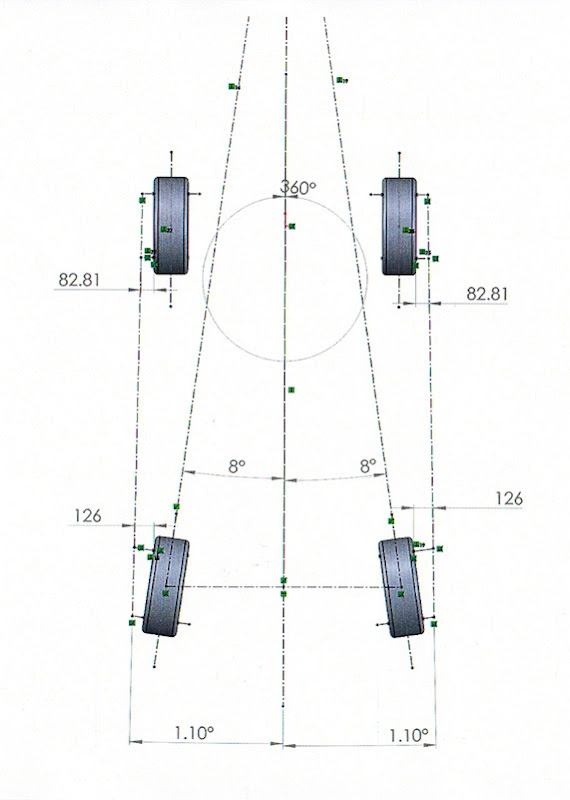
The next image shows the aligned condition.
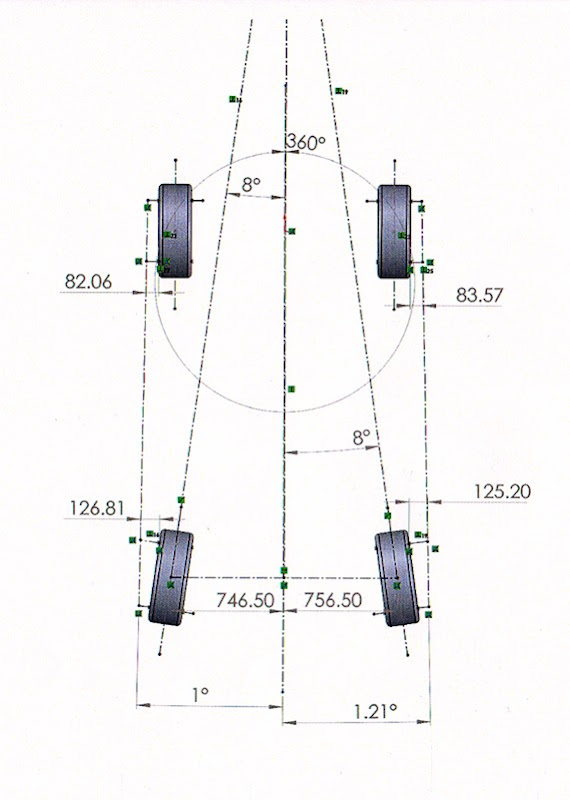
This third diagram shows that offsetting the rear wheels 5mm (a not unlikely condition because of manufacturing tolerances) does not adversely affect the precision inherent in this method.
Finally an animated series of images from the Solidworks model showing the relationships between the individual wheels as the system moves from aligned to misaligned… and back.


